There’s something special about homemade rusks and there’s certainly nothing more heart warming than the aromas of rusks slowly baking in the oven on a cold winter’s day. The humble rusk is easier to make than you think!
For the sake of full disclosure, the process of developing this recipe was not without a few bumps. You see, rusks weren’t designed to be sugar or fat free. They were engineered to be packed with just about as much sugar and butter you could find in the house. So, of course, removing the essence of rusks would prove to be a bit tricky. Nonetheless, they turned out pretty darn delicious!
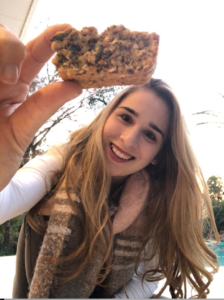
This recipe is loaded with fibre – from the digestive bran, oats and all bran flakes. The mixed seeds provide a good dose of healthy unsaturated fats. The rusks are relatively low in saturated fat (that’s the bad one!) too – all dairy products chosen were fat free, and margarine was chosen over butter.
You know I always like giving some variations, so here goes… Think cinnamon, nutmeg, aniseed, dark chocolate chips, nuts, dried fruits, orange rind, coconut…
Of course if you are diabetic, swap out the sugar for sweetener. And if you’re feeling adventurous, swap out the self raising flour for bran rich self raising flour for an extra fibre kick!
Ingredients (Makes: 35 rusks)
- 500g self raising flour
- 30g digestive bran
- 15ml baking powder
- 5ml salt
- 2 cups all bran flakes
- 1 cup oats
- 1 ½ cup mixed seeds
- 45g margarine
- 75g brown sugar
- 2 large eggs
- 270ml plain fat free yoghurt
- 60ml fat free milk
- 10ml vanilla essence
Method
- Preheat the oven to 180 degrees and spray a baking tray with spray n cook.
- Mix all the dry ingredients in a large mixing bowl.
- Melt the margarine and sugar in a pot. Stir until dissolved. Add the margarine sugar mixture to the dry ingredients.
- In a separate bowl, using a whisk beat the yoghurt, eggs and milk together. Add to the dry ingredients. Mix until well combined. Don’t be alarmed, it is quite a dry mix!
- Press the dough into the baking tray. (HINT: wet your hands to ensure the mixture does not stick to your fingers when pressing down!).
- Using a knife, mark the rusks lengthwise and in width to your desired size (I did about 5cm x 8cm).
- Bake the rusks for 1 hour and remove from the oven.
- Turn the oven down to 110 degrees.
- Using a sharp knife cut through the rusks on the marked lines and place onto a baking sheet.
- Place the rusks back in the oven for 1 hour or until dry and crunchy.
- Remove from the oven and allow to cool. Store in an airtight container.
ENJOY!
These rusks are seriously good… especially when dunked in some tea or coffee!
Have I convinced you to make your own rusks yet?
Keep warm and enjoy the long weekend,
Shani
X